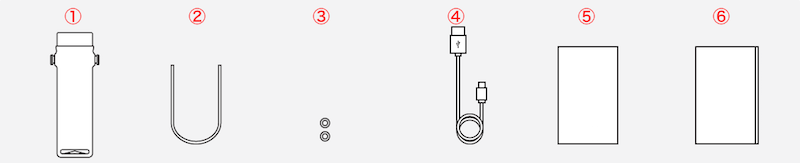
1. Starter

1-1. Box Contents

items

  1. cloudiss unit x1
  2. Leather strap x1
  3. Spacer (for when not using the strap) x2
  4. Micro USB cable
  5. Warranty information
  6. Quick setup guide

1-2. Main Features

  1. Setup multiple alarms and actively terminate them
    Set up 10 scheduled alarms, at any time of the day, in both 12 and 24 hour formats.And terminating those alarms you need to shake cloudiss actively.(*)
  2. Synchronize with Google Calendar
    You can sync your Google Calendar schedule with the cloudiss app.Once you connected to the cloudiss app,it will automatically update your schedule(**) and set an alarm for the first scheduled item of the day.Also you can set an offset for the calendar alarm.For example, when you set a 2 hour offset and synchronize your schedule that start from 9:30 am, cloudiss app will set an alarm for 7:30 am (2 hours (ofset) before the first schedule’s start time ).
  3. Voice notification
    cloudiss read your Google calendar schedule or alarm note(you can set it in cloudiss app for each alarm schedule).

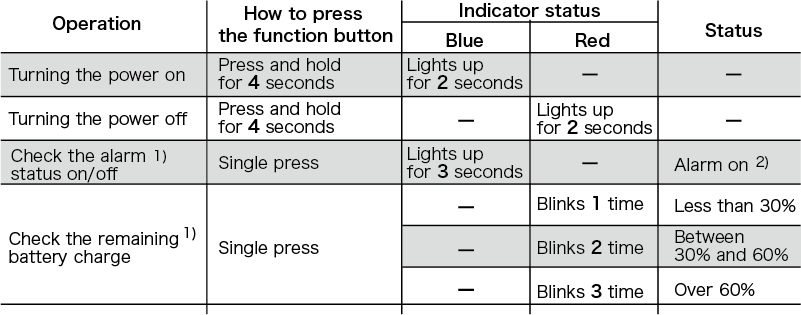
* Alarm will stop automatically after sounding for 15 minutes, or you can stop it immediately via the app.
** To sync your Google Calendar schedule, you need internet access and the cloudiss app is connecting to your cloudiss unit.

1-3. Overview

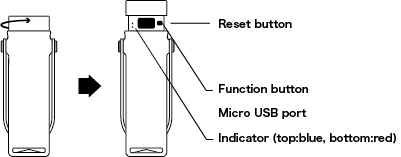
If you the rotate wooden cap in a counterclockwise direction you will be able to see and access the indicator LEDs, USB connector, function button and factory reset button.

LED combination in each situation

led combination matrix

  1. These patterns work only when cloudiss is turned on
  2. Blue LED will only light when an alarm is set

1-4. Initial Setup

  1. Press and hold the function button for at least 4 sec, the blue LED will light up and your cloudiss will be ready for connection to the cloudiss app.
  2. Make sure Bluetooth is enabled on your smartphone and run the cloudiss app.
  3. In the cloudiss app, you will need to select the unique ID of your cloudiss. If your cloudiss’ unique ID is not listed tap refresh to update the list.
  4. Your cloudiss’ unique ID is printed on the warranty card included with your cloudiss, select the corresponding ID and the cloudiss app will be connected.
  5. If the connection is succesfully completed you will see the “Registration succesful” page and the cloudiss app will ask if you want to start the tutorial or not. Select [Start guide] or [Close guide] to complete initial setup.

1-5. How to stop an alarm.

cloudiss assist waking up, and you need to shake it actively.
We recommend that it would be better to stop by shaking up and down direction.

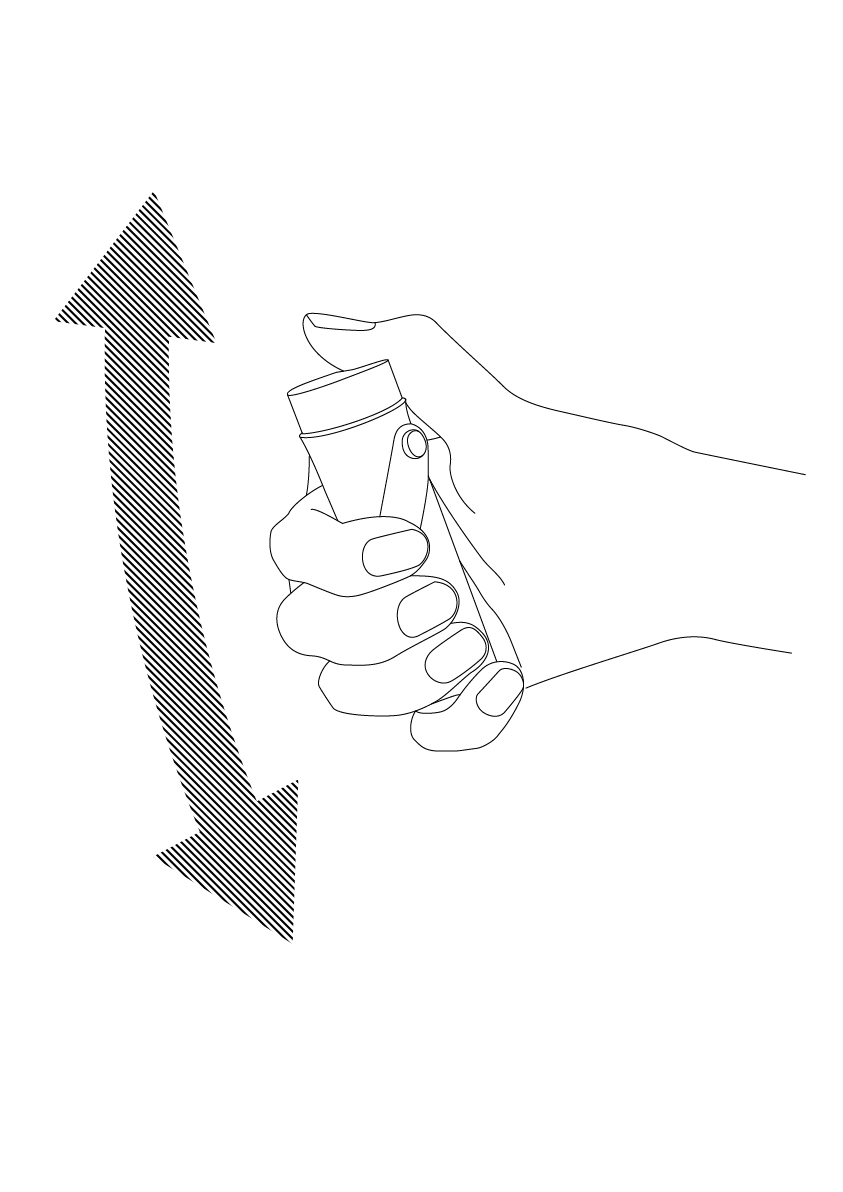
You can also stop by app.See 5-2 for more information.